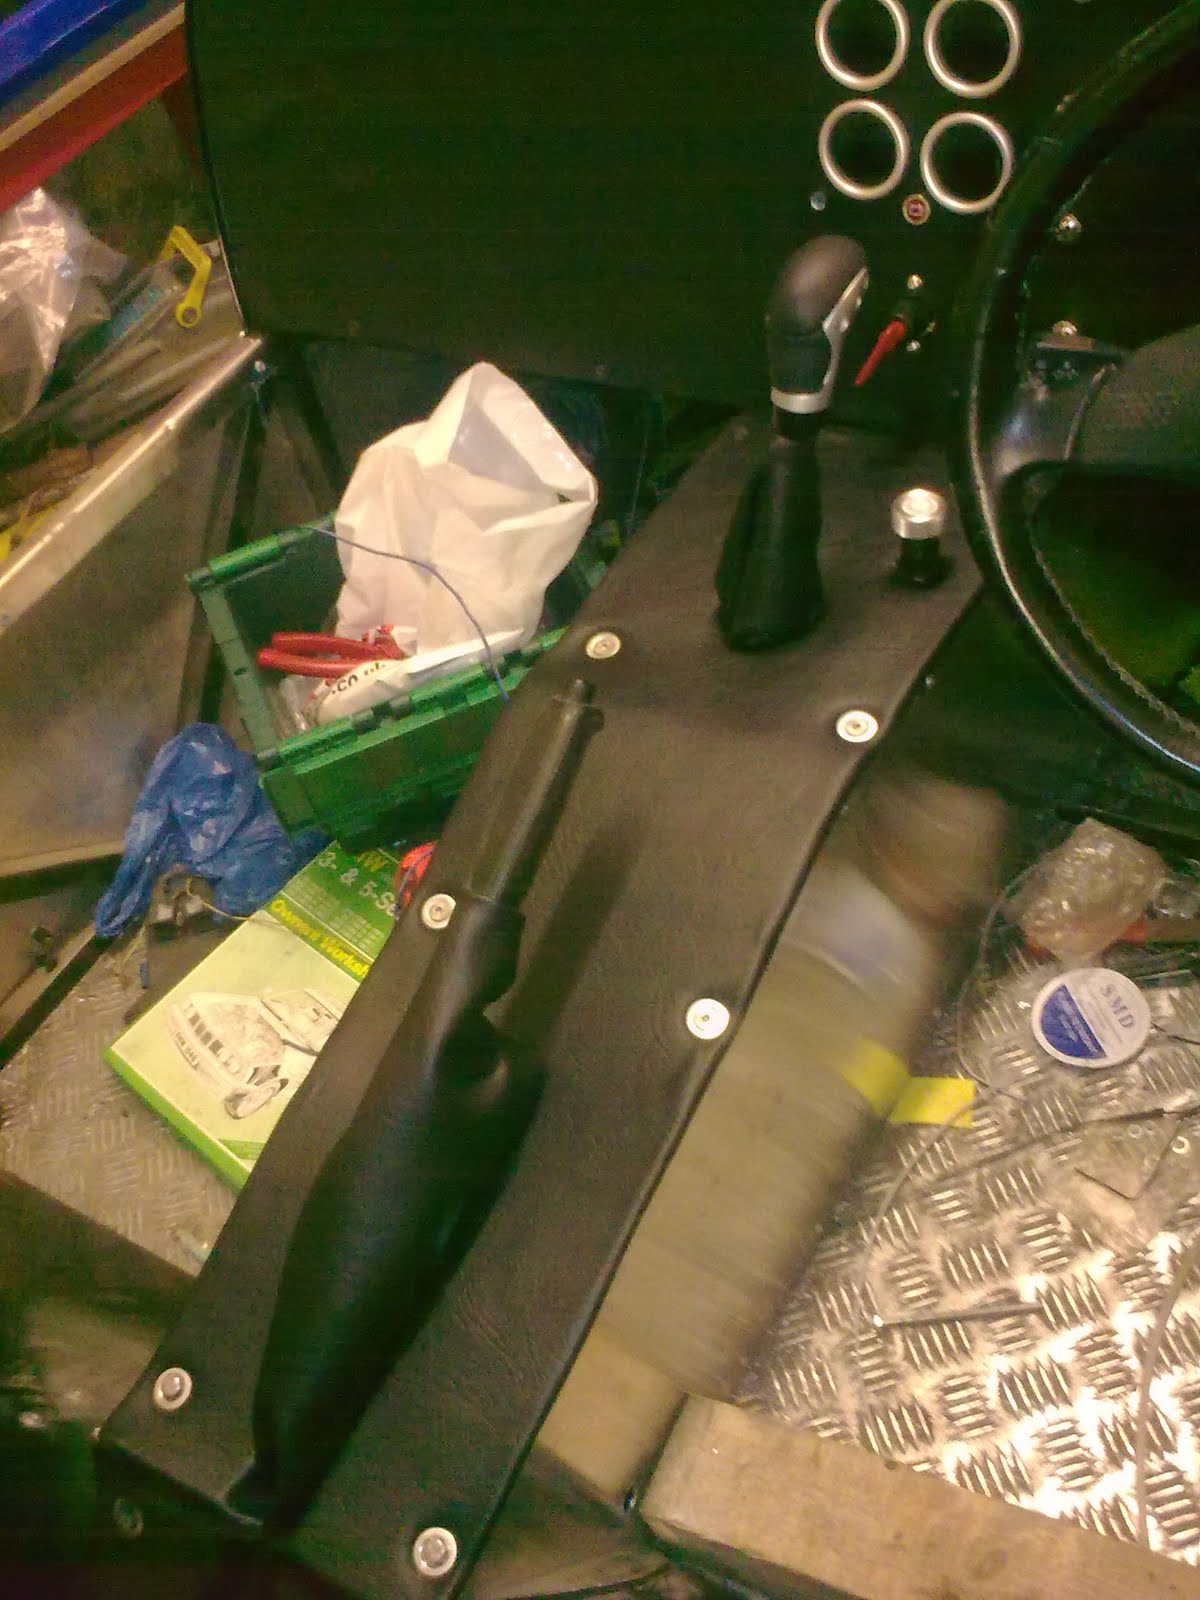
Over the last 2 nights (working after baby has gone to bed till around 10pm) I have got the new clutch installed and the engine back in and fully hooked up with water and electrics again. Last night was spent re-making electrical connections that got broke on engine removal, and re-installing the exhausts.
I didn't actually start the engine and tets the clutch as it was 10pm at the time and I would have woken the baby, and annoyed the neighbours. I'll see this evening after work if all the hard work has been worth it and the clutch operates again.
It had better do, I have a track day on Saturday!!!
Thursday, September 8, 2011
Thursday, September 1, 2011
Well, I broke it again, and this time I had to get the engine out to fix it. On my last track day the clutch gave up and I couldn't get any gears. I suspected hydraulic failure, but after changing the whole system, there was no improvement.
So I proceeded to remove the engine to get at the clutch and find out what was wrong with it.
My wife and daughter lending a hand.

So I proceeded to remove the engine to get at the clutch and find out what was wrong with it.
My wife and daughter lending a hand.

A hole I had to cut in the passenger footwell to get at the clutch slave cylinder.


Lifting the engine out (yes, by the exhaust manifolds)


Front bodywork and radiator removed in preparation for engine removal

Lifting the engine out (yes, by the exhaust manifolds)

Bits of friction material sticking out of the clutch assembly:


Here you can clearly see that it's a dual mass flywheel :(

And at last the answer, all friction material missing from the flywheel side of the friction plate.

Looking at the side of the friction plate, plenty of friction material on one side, all missing from the other!


More friction material in the bellhousing and on the floor

Here you can clearly see that it's a dual mass flywheel :(

And at last the answer, all friction material missing from the flywheel side of the friction plate.

Looking at the side of the friction plate, plenty of friction material on one side, all missing from the other!

Thursday, July 14, 2011
Hello everyone! Well I haven't postsed since May, and the reason for that is that this is the build diary for the car, and, well, it's built!
As you may have already read, the car did it's first track day a couple of months ago, and came through it with some minor issues, all have now been fixed. The next track day is in a couple of weeks time, but this time It has a full set of track day tyres, which should hopefully provide much more grip. I also intend to tweak the brakes to get more power out of them.
I won't be posting here very frequently any more, as like i said, the car is built. I am planning on some big upgrades over the winter, and will post as I'm doing them. I intend to replace the BMW master cylinder with a servo assisted one for a sierra XR4i I have. And that will require removing the engine and gearbox to re-route brake lines. At that time i will also repair the leaking oil seal on the gearbox.
I will post pics up as they come, but for now - thanks for reading! I hope you enjoyed it.
Sam.
Saturday, May 21, 2011
I've sneaked in some garage time this week.
I've fitted a new circlip to the gear selector mechanism to stop it separating again, hopefully.
I looked at the cooling system and found that the rad bottom hose was leaking as the hose clip simply wasn't done up tight enough - doh! The thermostat housing was indeed cracked and has been removed. I've ordered a replacement housing and am awaiting it's arrival in the post.
Apart from the repairs, I've been making new camera mounts. I did use my on board video camera last week but unfortunately it's location meant it couldn't see much and the videos were crap. So my small camera is now mounted on the steering rack extension just inside the drivers side front wheel. It should have a great view from down there. I've also made a roll bar mount for my ordinary camcorder.
Will do some more work on it tomorrow.
Wednesday, May 18, 2011


Sunday, May 15, 2011
Well yesterday it went out on track for the very first time!
I had a track day at Llandow circuit, arranged by Complete Kit Car magazine and in the morning the 40 cars were split into 4 groups, according to driver ability - I was in the begginers group.
The experts group went out first, and withing about 5 laps, there was an accident! One car span out following the slow section of the track, the car following didn't see the yellow flags and drove into him. Both cars retired for the day with front suspension and chassis damage. The rest of the day was incident free.
My group went out at around 11am, the first few laps taken at low speed to get to know the track and get the feel of the car. It all felt ok so after 3 laps the yellow flags are lifted and we can start going for it at full speed. The car was VERY quick, but the brakes are quite weak - I had to press the pedal very hard to slow it down, and use lots of engine braking - so much so that I was getting small lock-ups when dropping to 2nd gear for the "bus stop" chicane.
After 10 laps or so, coming around "devils elbow" I heard a bang! I decided immediately to return to the pits. When I went for a gearchange, I found the gearstick was floppy and not responding - the car was stuck in 4th gear. I drove it back to the pits and found the selector linkage had lost a retaining clip and separated at the earbox end. With some help from my passenger and some bits and bobs from fellow drivers, we cobbled together a repair in time to get back out for the next session.
The second session was incident free, and I got more confident with the car and was pushing it hard. I nearly span when entering the bus stop in 3rd gear after overtaking somebody and missing my gearchange, and had a good fishtailing session round devils elbow after getting on the power too early too - great fun! We did the whole session with the repaired selector!
On returning to the pits - disaster! My Dad pointed to the nose, and a lot of water pouring out of the car! The bottom radiator hose was leaking badly, and on removing the bonnet, I also found the thermostat housing had cracked and was leaking water badly. That was the end of that.
I let the car cool down over lunch break, and John helped me load it back on the trailer. After lunch I got offered a ride in a Westfield ZEi which was great, and showed me just how far I have to go with my car, the grip was much better and his brakes were a lot stronger.
So now I have a bunch of work to do before the next track day:
Repair the cooling system.
Repair the gear selector properly.
Upgrade the brakes (somehow?)
Fit better tyres - slicks maybe?
I'll put some pics up as soon as I get them from the people who took them!
Monday, May 9, 2011
Wow getting behind on here again.
It tuned out the problem with the brake lights was with the mechanical switch I had fitted under the pedal was fouling and shorting out, blowing the fuse. I have now replaced this with a hydraulic switch in the front brake line.
I have now at last sorted out my cooling woes, I connected the top hose of the header tank back into the radiator top hose by using a take-off, this eliminated the airlock there and sealed the system, i also plumbed the overflow to an expansion tank which will catch any overflowing water. I tested the system yesterday and it all works as it should, no bubbling, and the cooling fan kicking in and out automatically.
I've also fitted a warning light to the low coolant sensor (part of the BMW donor) to give me early warning if the system is getting low in use.
I've fitted a few nice new decals i picked up at a recent car show to tart it up a bit.
I've made and fitted a mount for the on-board video camera.
Been polishing some of the oxidised aluminium panels.
Basically it's pretty much ready for it's first outing on track, which is next Saturday - can't wait!
Saturday, April 30, 2011


Friday, April 29, 2011
Thursday, April 28, 2011
yesterday I installed the new cooling fan, this time behind the radiator to maximise airflow to the font to improve cooling. This meant I had to fabricate new top brackets for the rad to move it forwards, this time I made them from aluminium and they look really good.
I've rewired the fan switch circuit, correctly this time, but it still doesn't seem to want to work. I might add in a manual switch for it.
I also secured the connections for the brake light switch, and when testing it the fuse blew, not sure what I've done there...
I've rewired the fan switch circuit, correctly this time, but it still doesn't seem to want to work. I might add in a manual switch for it.
I also secured the connections for the brake light switch, and when testing it the fuse blew, not sure what I've done there...
Tuesday, April 26, 2011
Ok I've completed the oil and filter change, and have been going over the car in preparations for the track day.
I found the cooling fan wasn't operating, and traced the fault to a broken wire in the loom, and repaired it. However, I found that in operation, the wiring got very hot, I'm guessing that this is because the old BMW fan is a little stuck, so I've ordered a new fan.
I also found that the left indicator isn't working, I'm not sure why yet, but I'm hoping it's not the relay, as a replacement may be quite expensive.
I still need to find a permanent fix for the brake light switch, and sort the loose bonnet out.
Tuesday, April 19, 2011
Ok, I finally got the cooling system to flow properly - and it was a very old school method of doing it. As the thermostat wasn't opening early enough, I drilled 2 4mm holes in it to allow water to flow through it at a reduced rate before it opens by itself.
I was busy all weekend so didn't get any time on it, but have tomorrow off, when i will change the oil and filter, and re-assemble the completed nosecone onto it.
I also want to sort out the loose fitting bonnet and charge the battery, and then it should be good to go.
It's only 3 1/2 weeks to go now before it makes it's track debut at Llandow!
Friday, April 15, 2011

Tuesday, April 12, 2011
I'm getting some really good advice on this from the guys over on the haynes forum. Looks like i have prevented the water flowing round the system properly by blocking off the redundant heater circuit. So I basically need to re-arrange the the hoses on the rear water rail to resore water flow. I'll try and get this done over the next few days, I may have to order some new parts (pipe connectors etc)


Saturday, April 9, 2011
Got a bit done today, fitted the aecond of the 2 extra silencers, and the exhausts now sound much quieter. In fact, it sounds great, really very happy with that. Also fitted the new water pump and thermostat. Ran it up, and after 15 mins of running - IT BOILED UP AGAIN!!!! Really fed up of it today. spent over £100 on new parts and it's just no different at all. It MUST be airlocked, there is no other explanation. I thought I had got all the air out via the top hose at the pump end. Have a look at the pictures below and see if you can see where the air is trapped and how to get it out. Comment if you have any ideas please. 1. Water pump removed  2. New pump and stat assembly bolted on - with original pulley.
  3. Pipes and drive belt fitted - the theromostat is located in the plastic housing on the left pipe, this goes to the radiator bottom outlet.
  4. a wider view, you can see the header tank behind the engine, on the bulkhead.
  5. profile view of the back end of the engine, showing the header tank and it's hose to the rear water rail.

 2. New pump and stat assembly bolted on - with original pulley.
  3. Pipes and drive belt fitted - the theromostat is located in the plastic housing on the left pipe, this goes to the radiator bottom outlet.
  4. a wider view, you can see the header tank behind the engine, on the bulkhead.
  5. profile view of the back end of the engine, showing the header tank and it's hose to the rear water rail.
Sunday, April 3, 2011
Here's the rear tonneau all made and fitted:  And here's the first exhaust modified with an additional silencer.
 I fitted a new thermostat to the engine and ran it up, and the engine boiled up again. Not happy. So I removed the water pump and ordered a new one, but found nothing wrong with the old one. There must simply be an airlock somewhere in the system. Still, not happy at the moment.
 And here's the first exhaust modified with an additional silencer.
  I fitted a new thermostat to the engine and ran it up, and the engine boiled up again. Not happy. So I removed the water pump and ordered a new one, but found nothing wrong with the old one. There must simply be an airlock somewhere in the system. Still, not happy at the moment.
 Wednesday, March 30, 2011
The bonding on the nosecone has set nicely, securing the grille in place. Today I got the new tyres fitted on the transporter trailer, and the springs for the brake pedal, and one of the new exhaust silencers arrived. I installed the brake pedal spring and it seems to work great. Will try to get more done tomorrow.
Tuesday, March 29, 2011
Had a look at the braking system and it turns out that the stickinh brakes are being caused by the brake pedal not returning to rest properly. This also explains why I was having difficulty finding the pedal when test driving it. All I need to do here is fit a spring to help the pedal reset after every use, I've ordered some springs and it should be a fairly simple job. I've installed the tonneau cover, looks good too. I've re-wired the lambda sensors so that the wires now pass through the side panels, as they were catching on the trailer when loading /unloading the car. I've removed the nosecone and fitted a mesh grile I made, bonded that on today so the glue should be nicely set tomorrow. I replaced the fan belt with a slightly shorter one and so far it seems to be working well. Still left to do then: replace missing thermostat oil and filter service re-fit nosecone modify brake pedal add an extra silencer to each exhaust replace the tyres on the transporter trailer buy a set of wheel strops to lash it down properly. oh, and give it a good clean. One more thing, I was contacted today by Ian Stent of Complete Kit Car magazine to pay up for their track day in May. So it's now official, it's booked in to go on track on Saturday May 14th.
Monday, March 21, 2011
Well since the big high of Saturday when I drove it, I've now made a new list of things to do to it.
1. Replace sticking rear brake calipers
2. Replace fan belt with a shorter one (it's squealing a little)
3. Modify Brake pedal (I just can't find it quick enough)
4. Fit a mesh grille to the nosecone.
5. Install the tonneau cover
6. Modify the exhausts to quieten them
7. Charge the battery.
8. Replace the transporter trailer tyres.
So all in all, not too bad of a list of jobs to do, to be honest I'm quite happy with it. I'll get it all done over the next couple of weeks and then run it again.
Saturday, March 19, 2011
People, today is a BIG day. Today, I drove it for the very first time!
Stormy and then got it loaded onto my home made transporter trailer (see my other blog) after some playing around to work out a procedure for doing it. A car running this low to the ground is difficult to load, but we got there. Below are a couple of pics:


I had a practice tow of the trailer as well, got about 400 yards before one of the ancient tyres on it blew out. Not too bothered about it as there's no damage to the rim, and the tyres have to be changed anyway.
Stormy came over and helped me get it out of the garage and into a large deserted private car park where I drove it up and down slowly in first gear to make sure everything works as it should.
Oh my goodness it's FAAAAAASSST!!!!! Brakes are ok, but need bedding in to improve. That was, until the the rear brakes stuck on. Not sure why, but at a guess I'd say I need new calipers. It's also too loud, I need to find some way of quietening it down a bit, or no track is going to let me run it.
Stormy and then got it loaded onto my home made transporter trailer (see my other blog) after some playing around to work out a procedure for doing it. A car running this low to the ground is difficult to load, but we got there. Below are a couple of pics:


I had a practice tow of the trailer as well, got about 400 yards before one of the ancient tyres on it blew out. Not too bothered about it as there's no damage to the rim, and the tyres have to be changed anyway.
Thursday, March 17, 2011
This morning I installed the mirrors, and gave the speedo some attention. After speaking with digital speedo's, who sold it to me, I was informed that my setup wasn't quite right. So after re-making the sensor's mounting bracket, and fitting the sense magnets into the rear drive shaft by drilling small holes for them, it's working - sort of. It picks up speeds up to 34mph then for some reason it goes back down to 14, then 9, then 0. Not sure what's wrong now.
I also marked out the vinyl for the tonneau cover and gave it to Yvonne to sew up for me, she informs me she will do it for me tomorrow.
Stormy is coming over on Saturday to help me get it out for the first time and test drive it.
I also marked out the vinyl for the tonneau cover and gave it to Yvonne to sew up for me, she informs me she will do it for me tomorrow.
Stormy is coming over on Saturday to help me get it out for the first time and test drive it.
Wednesday, March 16, 2011


Tuesday, March 15, 2011
Well it's one of theose few occasions I can say - mission accomplished. This morning I fabricated a bracket to replace the fan belt tensioner spring and installed it, and got the belt nice and tight.
I then proceeded to fit the nosecone and the front indicators, and it's looking great. I'll post up a pic or 2 tonight.
So here's the list of things left to do:
Install mirrors
Make and fit tonneau cover
Get the speedo working
Fit back wheels and put it back on the ground
test drive - and test it's transporter trailer
I'm sure the test drive will throw up a few problems that need sorting before I take it out on track, but that's a list I'll come to later.
Getting excited now.
Monday, March 14, 2011
Had my usual few hours in the garage yesterday. I polished up all the painted bits with the new mop head on my grinder. To be honest, I'm not very happy with my efforts on the paint. It's got runs, there are pinholes in it, grit in other places, and it just doesn't look great. I think once i've run the car over the summer, I'll take them all off and give them to a bodyshop to be professionally re-done.
Anyhow, I've refitted the arches, and despite the shoddy painting, they actually look good, the metallic blue against the aluminium bodywork. I'll take some pics when the nose is back on.
Yesterday I also did some odd jobs on th back axle that have been waiting for ages, I fully welded the bottom shock mounts and fitted high tensile bolts and locknuts to them too.
This morning I popped to halfords and bought a shorter fan belt for the front of the engine. This is to remove the power steering pump for the drive, it's not connected to anything and will seize up if i run it for any length of time. I left it on the engine to give me the option of using it, but for now I've decided against it. So anyway, I got a decent belt, and re-routed it, but I now need to modify the tensioner pulley as it's spring is now working against the belt in it's new position. I'll remove the spring and replace it with a solit bracket, there will still be some adjustment in it's mounts. Hope to get that done tomorrow.
Once that's done, i can refit the nosecone and install the front indicators, and crack on with the last few jobs i need to do to get it finished!!!!
Tuesday, March 8, 2011
Had another good session on it on Sunday, got the harnesses fitted - they really hold you in there!
I also removed the rear wheels and arches and prepped the arches for paint, giving them, their first coats of plastic primer in readiness for some colour.
I need to pop to my local mchine mart to get a polishing mop for my angle grinder, so I can polish all the painted bits now.
I also removed the rear wheels and arches and prepped the arches for paint, giving them, their first coats of plastic primer in readiness for some colour.
I need to pop to my local mchine mart to get a polishing mop for my angle grinder, so I can polish all the painted bits now.
Saturday, March 5, 2011
Had a great day on it today, gave the nosecone and front arches their final coat of laquer today, then went on to completely make the seats. I glued foam over the bases and back, then covered them all with vinyl and mounted it all in the car. I'm really happy with them, they look good and are very comfortable. The driving position is good too.
Friday, March 4, 2011
Ok picture post!
Here's the bonnet folded and fitted, not quite happy with the gap you can see down the side of the nosecone - hope to sort that soon.

Today I started to make the seats, plywood bases mounted on some 25mm SHS steel.

Here you can see the detail of the steel supports under the seat bases.

And here's the nosecone after 2 coats of colour - I finally settled on Peugeot Aegean Blue. After this pic I applied 2 coats of clearcoat and it's looking really good. A few hours of polishing and it'll look great. Also painted the front arches at the same time.

Monday, February 21, 2011
Last week my Dad popped up to see us, and as he was there I jumped at the chance for some asisstance and got him to help me form the bonnet, using a gas cylinder as a forming tool.
Dad helped me make the basic bends in the aluminium, and i finished it off with some folds on the bottom lips and fitted the clamps to the car. A bit of edging trim front and back and it looks ok. I'm not 100% happy with the fit, but there's not a lot I can do about it now.
I spent my weekend time in the garage entirely working on the nosecone, the endless filling and sanding to make it smooth continues... well, I can actually see light at the end of the tunnel now, the top surface is finished, and the sides should only need 1 more coat of filler and final sanding. Once done i can paint it in primer, then remove the rear wings and paint all the GRP parts. I still havent decided what colour though.
Have pics, will post soon.
Tuesday, February 15, 2011
The aluminium for the bonnet arrived this morning, and I immediately laid on the template and cut it out. All I need now is some assistance to form it over the car, then fold over the bottom edges, install the latches and job done. I'm sure it won't be that simple though, nothing ever is on this car.
I've also had another good tidy-up in the garage, a glazier replaced the broken door windows today. It's amazing how much nicer a place it is to be when your not constantly climbing over stuff to get where you want to be.
I've also had another good tidy-up in the garage, a glazier replaced the broken door windows today. It's amazing how much nicer a place it is to be when your not constantly climbing over stuff to get where you want to be.
Monday, February 14, 2011


Thursday, February 10, 2011
Yesterday evening I got the front wheelstays refitted, and applied the first layer of filler to the nosecone. I gave it a good sanding, and this evening I'll apply the second layer.
I also trial fitted one of the new rear wheels with the large slick tyres. It fits, but only just, I think I'll have to trim avery small amount from the front lip of the wheelarches (doesn't matter as they aren't visible anyway) and raise the suspension a little when using them to ensure they don't foul the rear lights.
I took some pics and hope to put them up tonight.
Wednesday, February 9, 2011
Since my last post, I've collected the painted wingstays and they look gorgeous. I'm going to refit them this evening and start filling the nosecone.
The nosecone requires quite a lot of work as where I widened it, it's lost some of it's shape.
Yesterday a nice present arrived in the post, 2 lovely slick tyres to fit the rear wheels. I had them fitted and they look the business. I need to try them on to make sure thye fit, the rear arches may need a little trimming to allow the wheels to turn freely.
Tuesday, February 1, 2011


Monday, January 31, 2011
Yesterday i cracked on with the front wing stays. I formed them around the front tyres, leaving 2" clearance between the tyre and stay. I then located the fibreglass front arches in place and drilled through into the steel stays. I Tapped M5 threads into the steel stays and then fixed the arches in place with stainless steel bolts.
I then stripped it all poff again, as the wingstays now have to be sandblasted and painted, hopefully today.
I have also made the hole in the nosecone for the cone air filter to poke through, it looks quite good actually.
As always, I've taken a few pics as I went along, and will post them soon.
I then stripped it all poff again, as the wingstays now have to be sandblasted and painted, hopefully today.
I have also made the hole in the nosecone for the cone air filter to poke through, it looks quite good actually.
As always, I've taken a few pics as I went along, and will post them soon.
Sunday, January 23, 2011
Finally, another picture post!
Here's the back end, completed apart from a panel to cover the rear axle area, which also houses the battery and fuel tank. You can also see the completed dash.
 The engine bay, on the front of the engine is the water pump/thermostat housing that has caused me some trouble recently.

Here's the oil pressure sensor, fixed to the home made thread adaptor, made from an old wheel bolt.

And here's what I did earlier today, the centre console. An aluminium panel covered in thin foam, then vinyl, along with handbrake and gear gaitors made from offcuts of the same vinyl.

Here's the back end, completed apart from a panel to cover the rear axle area, which also houses the battery and fuel tank. You can also see the completed dash.
 The engine bay, on the front of the engine is the water pump/thermostat housing that has caused me some trouble recently.
Here's the oil pressure sensor, fixed to the home made thread adaptor, made from an old wheel bolt.

And here's what I did earlier today, the centre console. An aluminium panel covered in thin foam, then vinyl, along with handbrake and gear gaitors made from offcuts of the same vinyl.
Friday, January 21, 2011
Today I removed and tested the thermostat, by placing it in a pan of boiling water. After a few minutes of boiling, it opened, but not much. It's meant to open fully at 85 degrees, so it's knackered.
I cut the working parts from the centre, as the outer ring supports the rubber o-ring seal that fits to the housing, then refitted it to the engine. After running the engine for a while, and manipulating the rad hoses to ensure there were no airlocks, the water flowed nicely through the rad. The engine temperature settled nicely at around 70 degrees.
Today I also fitted the oil pressure sensor using the adaptor I made, and the gauge now works. The oilpressure starts off at about 100psi at cold, going down to about 25 when hot, and the gauge reacts very quickly when the engine is revved.
Next to do I guess is the front wingstays and wings, nosecone, bonnet (need more aluminium) and drive tunnel top.
Thursday, January 20, 2011
Not a great day today.
I ran the engine yesterday to warm it up, and it boiled up after about 20 mins, with the rad remaining cool, hmmm. After seeking advice I tried removing any airlocks from the system today. Got some air out, ran the engine, same thing happened. Not happy. Looks like either the thermostat is jammed shut, or the water pump is knackered. Both of which are expensive parts. Doubly not happy.
On the plus side, reading back to my post of Jan 4th, I made mention that I couldn't complete installation of the oil pressure gauge till I got a suitable thread adaptor for the sender. Well, I just finished making one, from an old BMW wheel bolt! I'll fit it tomorrow and try it out.
Monday, January 17, 2011
Wiring loom - done!!!
Yesterday I completed all the outstanding circuits, wrapped all the loose wires, finally mounted the fusebox and fixed in the dashboard.
Next on the list is the front wingstays (need to bend them to shape, sandblast and paint them) and then the front cycle wings.
After them I'll mount the nosecone and do all the filling that needs to be done on that, which is a lot.
It has been pointed out to me that I haven't published any photo's for a while, I'll try to get some up soon.
Friday, January 14, 2011
Yesterday evening I scraped an hour or so in the garage and got at least some of my list done.
I wired up the foglamp and it's telltale, wired up the reversing light, both are working well. I also wired up most of the horn circuit, I only need to mount the switch. I'm actually going to buy a better switch as the one I bought from Maplin doesn't look like it will last very long in use.
I also need to buy a few more very small cable connectors for the brake warning light, then i can complete that circuit as well.
Just wish i could get a little more time to get things done....
Monday, January 10, 2011
For once I can say, all tasks accomplished!
On Saturday I re-installed the passenger side exhaust and ran the engine - all sealed up nicely!
On Sunday I completed installation of the speedo and the hazard lights. I also had enough time to spare to wire up the brake lights too.
the only downer is that it turns out that thje speedo unit doesn't actually have the fuel gauge function on it, bugger. It's not the end of the world though, as I can always upgrade it to a nicer one in the future anyway.
So I'm going to stick my neck out here and set myself another list of stuff to do by nex weekend.
1. Wire up Fog lamp
2. Wire up reversing lamp
3. Wire brake warning light (handbrake and fluid level warning)
4. Wire up the horn
If I can get all these done then that will complete the wiring loom, and I can move on to finishing the bodywork.
Saturday, January 8, 2011
Alright, well i have removed the blowing exhaust manifold from the passenger side of the engine, and had it machined so that the faces of all the ports are flat and level to one another. I'll refit that today and it should hopefully cure the bad blowing I had there.
I've also completed the indicators, they all work now, also the hazard lights (although I have yet to fit a switch for them), that's on the list for today.
On Thursday i finally recieved the digital speedometer i had ordered, and found it also has a built in fuel gauge which may be compatible with my sender. Fantastic. I have begu installation by making a bracket and installing the speed sensor on the rear axle. I need to do some more wiring (groan!) to install the speedo unit completely.
So those are the next few jobs for this weekend:
1. reassemble exhaust and test
2. complete hazard warning circuit
3. Complete installation of speedo/fuel gauge.
Tuesday, January 4, 2011
just had 10 days off over Christmas/new year, but back to the grind today. Well at least in my time off I got a bunch of stuff done.
Got the engine running
made the wiring loom
headlights - working
sidelights - working
tail lights - working
indicators - working
hazards - WIP
cooling fan - working
instruments - working (with the small exception of the oil pressure gauge which I need to make an adaptor for as the sender doesn't fit.)
just gotta do the reverse light, fog lamp, brake lights, brake warning lights and the horn and the wiring is complete! I can then at last finish the bodywork, make the interior and it's done!!!
Problem is finding the time now I'm back in work, bugger.
Subscribe to:
Posts (Atom)