Yesterday i cracked on with the front wing stays. I formed them around the front tyres, leaving 2" clearance between the tyre and stay. I then located the fibreglass front arches in place and drilled through into the steel stays. I Tapped M5 threads into the steel stays and then fixed the arches in place with stainless steel bolts.
I then stripped it all poff again, as the wingstays now have to be sandblasted and painted, hopefully today.
I have also made the hole in the nosecone for the cone air filter to poke through, it looks quite good actually.
As always, I've taken a few pics as I went along, and will post them soon.
Monday, January 31, 2011
Sunday, January 23, 2011
Finally, another picture post!
Here's the back end, completed apart from a panel to cover the rear axle area, which also houses the battery and fuel tank. You can also see the completed dash.
 The engine bay, on the front of the engine is the water pump/thermostat housing that has caused me some trouble recently.

Here's the oil pressure sensor, fixed to the home made thread adaptor, made from an old wheel bolt.

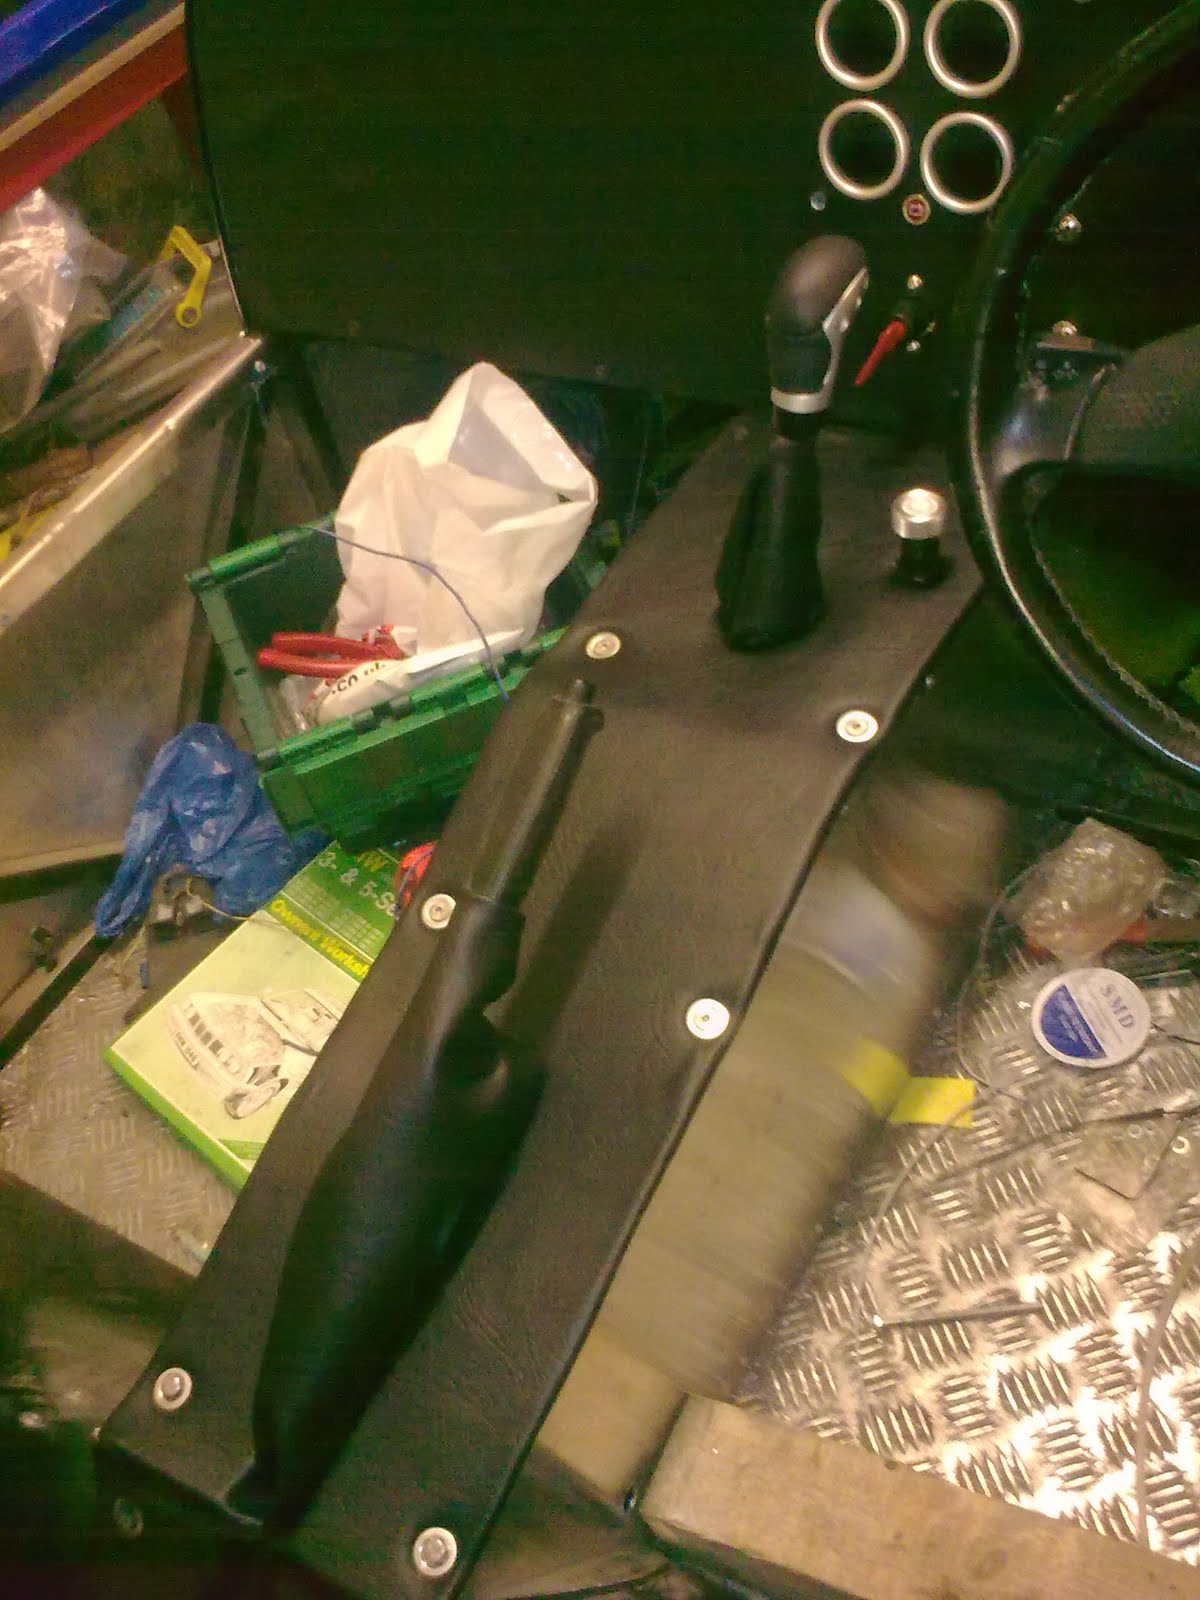
And here's what I did earlier today, the centre console. An aluminium panel covered in thin foam, then vinyl, along with handbrake and gear gaitors made from offcuts of the same vinyl.

Here's the back end, completed apart from a panel to cover the rear axle area, which also houses the battery and fuel tank. You can also see the completed dash.
 The engine bay, on the front of the engine is the water pump/thermostat housing that has caused me some trouble recently.
Here's the oil pressure sensor, fixed to the home made thread adaptor, made from an old wheel bolt.

And here's what I did earlier today, the centre console. An aluminium panel covered in thin foam, then vinyl, along with handbrake and gear gaitors made from offcuts of the same vinyl.
Friday, January 21, 2011
Today I removed and tested the thermostat, by placing it in a pan of boiling water. After a few minutes of boiling, it opened, but not much. It's meant to open fully at 85 degrees, so it's knackered.
I cut the working parts from the centre, as the outer ring supports the rubber o-ring seal that fits to the housing, then refitted it to the engine. After running the engine for a while, and manipulating the rad hoses to ensure there were no airlocks, the water flowed nicely through the rad. The engine temperature settled nicely at around 70 degrees.
Today I also fitted the oil pressure sensor using the adaptor I made, and the gauge now works. The oilpressure starts off at about 100psi at cold, going down to about 25 when hot, and the gauge reacts very quickly when the engine is revved.
Next to do I guess is the front wingstays and wings, nosecone, bonnet (need more aluminium) and drive tunnel top.
Thursday, January 20, 2011
Not a great day today.
I ran the engine yesterday to warm it up, and it boiled up after about 20 mins, with the rad remaining cool, hmmm. After seeking advice I tried removing any airlocks from the system today. Got some air out, ran the engine, same thing happened. Not happy. Looks like either the thermostat is jammed shut, or the water pump is knackered. Both of which are expensive parts. Doubly not happy.
On the plus side, reading back to my post of Jan 4th, I made mention that I couldn't complete installation of the oil pressure gauge till I got a suitable thread adaptor for the sender. Well, I just finished making one, from an old BMW wheel bolt! I'll fit it tomorrow and try it out.
Monday, January 17, 2011
Wiring loom - done!!!
Yesterday I completed all the outstanding circuits, wrapped all the loose wires, finally mounted the fusebox and fixed in the dashboard.
Next on the list is the front wingstays (need to bend them to shape, sandblast and paint them) and then the front cycle wings.
After them I'll mount the nosecone and do all the filling that needs to be done on that, which is a lot.
It has been pointed out to me that I haven't published any photo's for a while, I'll try to get some up soon.
Friday, January 14, 2011
Yesterday evening I scraped an hour or so in the garage and got at least some of my list done.
I wired up the foglamp and it's telltale, wired up the reversing light, both are working well. I also wired up most of the horn circuit, I only need to mount the switch. I'm actually going to buy a better switch as the one I bought from Maplin doesn't look like it will last very long in use.
I also need to buy a few more very small cable connectors for the brake warning light, then i can complete that circuit as well.
Just wish i could get a little more time to get things done....
Monday, January 10, 2011
For once I can say, all tasks accomplished!
On Saturday I re-installed the passenger side exhaust and ran the engine - all sealed up nicely!
On Sunday I completed installation of the speedo and the hazard lights. I also had enough time to spare to wire up the brake lights too.
the only downer is that it turns out that thje speedo unit doesn't actually have the fuel gauge function on it, bugger. It's not the end of the world though, as I can always upgrade it to a nicer one in the future anyway.
So I'm going to stick my neck out here and set myself another list of stuff to do by nex weekend.
1. Wire up Fog lamp
2. Wire up reversing lamp
3. Wire brake warning light (handbrake and fluid level warning)
4. Wire up the horn
If I can get all these done then that will complete the wiring loom, and I can move on to finishing the bodywork.
Saturday, January 8, 2011
Alright, well i have removed the blowing exhaust manifold from the passenger side of the engine, and had it machined so that the faces of all the ports are flat and level to one another. I'll refit that today and it should hopefully cure the bad blowing I had there.
I've also completed the indicators, they all work now, also the hazard lights (although I have yet to fit a switch for them), that's on the list for today.
On Thursday i finally recieved the digital speedometer i had ordered, and found it also has a built in fuel gauge which may be compatible with my sender. Fantastic. I have begu installation by making a bracket and installing the speed sensor on the rear axle. I need to do some more wiring (groan!) to install the speedo unit completely.
So those are the next few jobs for this weekend:
1. reassemble exhaust and test
2. complete hazard warning circuit
3. Complete installation of speedo/fuel gauge.
Tuesday, January 4, 2011
just had 10 days off over Christmas/new year, but back to the grind today. Well at least in my time off I got a bunch of stuff done.
Got the engine running
made the wiring loom
headlights - working
sidelights - working
tail lights - working
indicators - working
hazards - WIP
cooling fan - working
instruments - working (with the small exception of the oil pressure gauge which I need to make an adaptor for as the sender doesn't fit.)
just gotta do the reverse light, fog lamp, brake lights, brake warning lights and the horn and the wiring is complete! I can then at last finish the bodywork, make the interior and it's done!!!
Problem is finding the time now I'm back in work, bugger.
Subscribe to:
Posts (Atom)